Chicken Rissoles (chicken patties!) | RecipeTin Eats
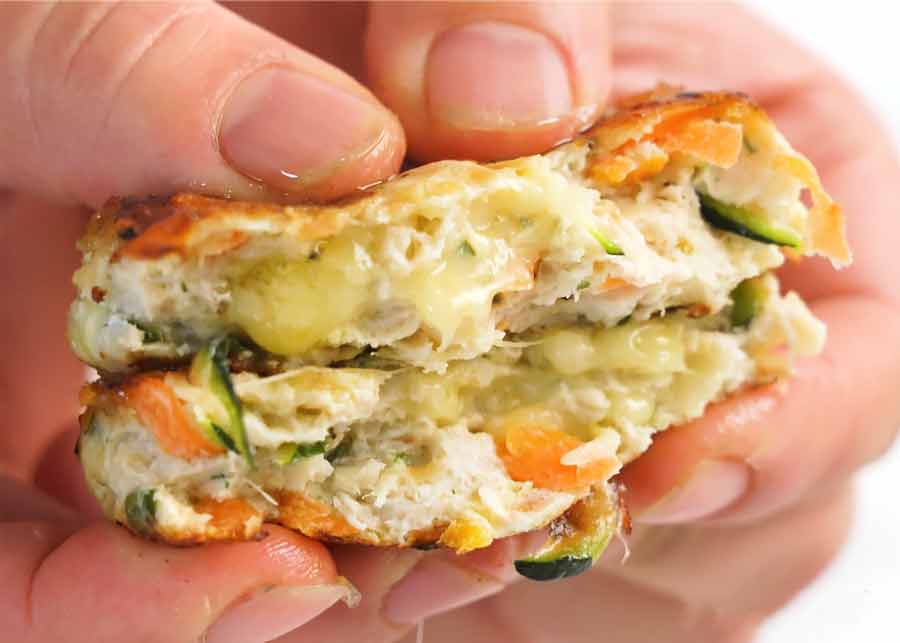
These chicken rissoles are golden on the outside with irresistible little pockets of oozy cheese inside. It’s my chicken mince version of the beloved Aussie beef rissole. There’s room for both in everybody’s life!

Chicken rissoles
Aussies love a good beef rissole. It’s right up there with other nostalgic Australian comfort meals like curried sausages, bangers and mash, and a good old-fashioned roast with all the trimmings.
In case you’re wondering what rissoles are, in Australia (and New Zealand) they are small meat patties that are usually pan-fried. And while we Aussies like to believe they’re exclusively ours (right!?) it turns out that actually there are different forms of rissoles all around the world made with other meats, fish/seafood and vegetables.
The classic Aussie version is made with beef mince, often mixed with grated vegetables, and flavoured with savoury seasonings such as Worcestershire sauce.
Today though I’m doing a spin on the classic using chicken. I’ve also doubled down on the non-traditional approach by adding cheese for much needed juiciness (because chicken mince = lean meat) as well as flavour.
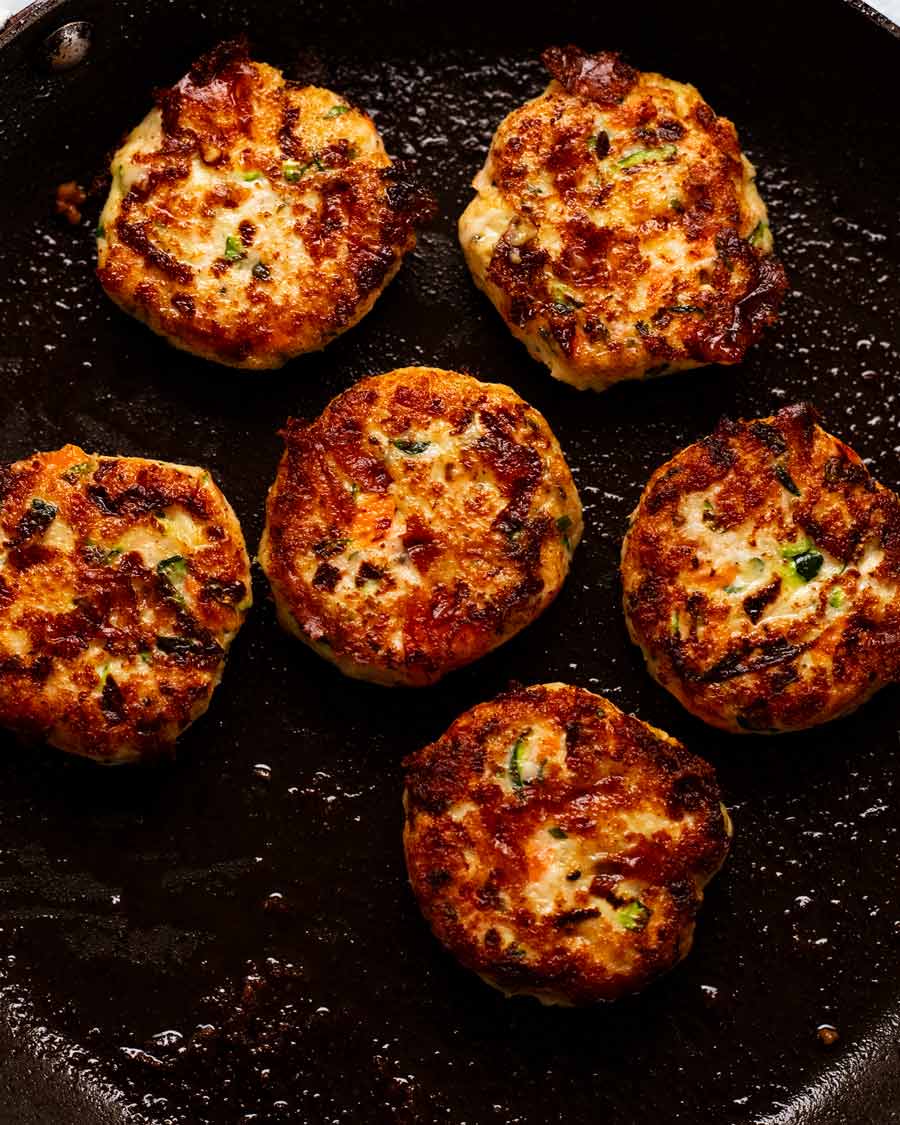
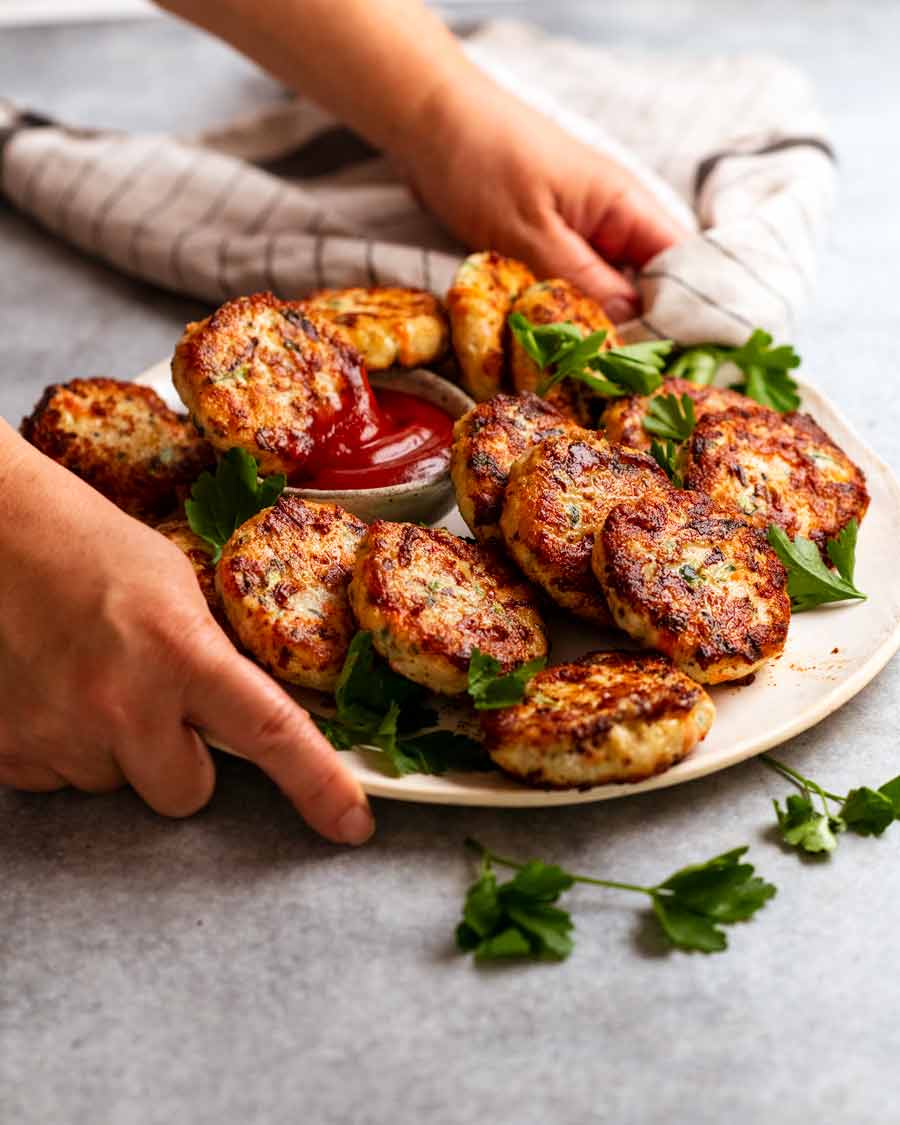
But you know you’re going to love them. Look at these golden beauties!
Proof of oozy cheese pockets inside:
What you need for Chicken Rissoles
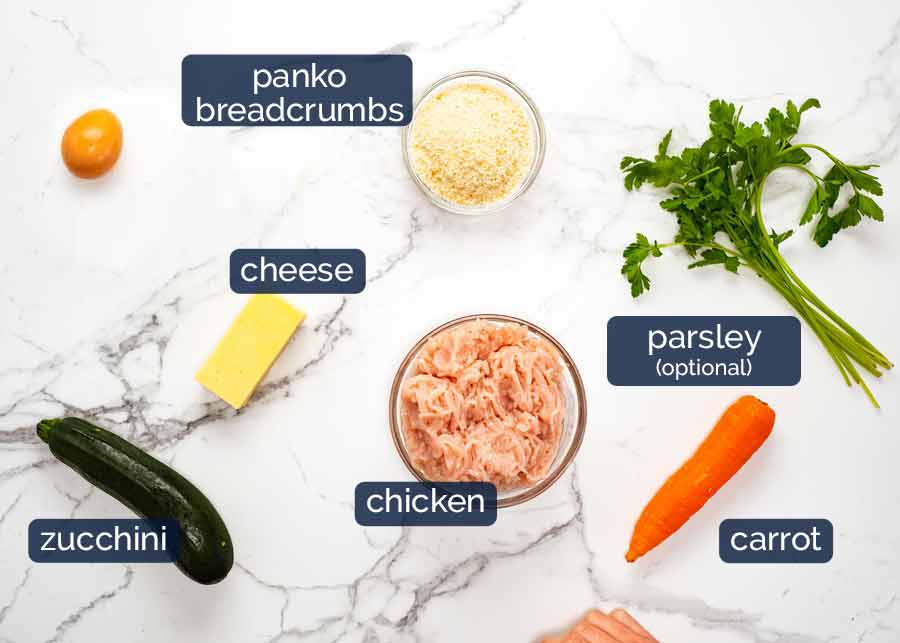
Here’s what you need to make these cheesy chicken rissoles:
-
Chicken mince (ground chicken) – This recipe is created with chicken mince but turkey or pork mince would make great direct substitutes with no alteration to the recipe. For beef and lamb, it’s better to use the classic Beef Rissoles recipe which has seasonings suited to red meats.
TIP: Chicken mince purchased in packets from supermarkets can be quite wet and soft. Pour off and discard any liquid pooled in the packet before using. If you are struggling to form patties because your mixture is too wet, add more breadcrumbs to absorb the excess moisture. But really try to avoid/minimise this as the drier the mixture gets, the less juicy your rissoles!
-
Panko breadcrumbs – Breadcrumbs are necessary to absorb some of the moisture so you can form patties. I like to use Panko breadcrumbs because it makes the inside of the rissoles softer than using the fine regular breadcrumbs.
Panko is a Japanese breadcrumb favoured for the extra-crispy coating it gives crumbed foods (crumbed tenders, schnitzel, Kiev). Find it in the Asian aisle of most large supermarkets.
Substitute with 2/3 cup regular breadcrumbs if you can’t find panko. A reader also reported these worked great with gluten-free breadcrumbs!
-
Cheese (shredded) – Adds flavour and juiciness to the inside of the rissoles. Chicken mince is very lean, so cheese really makes a difference to the tasty-factor. Pick a well-flavoured cheese that’s suitable for both shredding and melting. Colby, cheddar/tasty, Monterey Jack, gouda, and provolone are all good choices.
-
Carrot and zucchini – To bulk out the patties as well as adding some goodness to our diet. Double up on one or the other if you want more veg, or just prefer one veg.
Alternatives: corn, thawed peas or small diced frozen vegetables, or finely chopped cooked, cooled broccoli. You don’t want to use anything that needs cooking (like raw grated sweet potato) because the chicken mince will overcook before the vegetable cooks through. -
Egg – For binding. Just one. Any more and it will noticeably dry out the filling.
-
Parsley – Optional, for lovely little flecks of colour.
How to make chicken rissoles
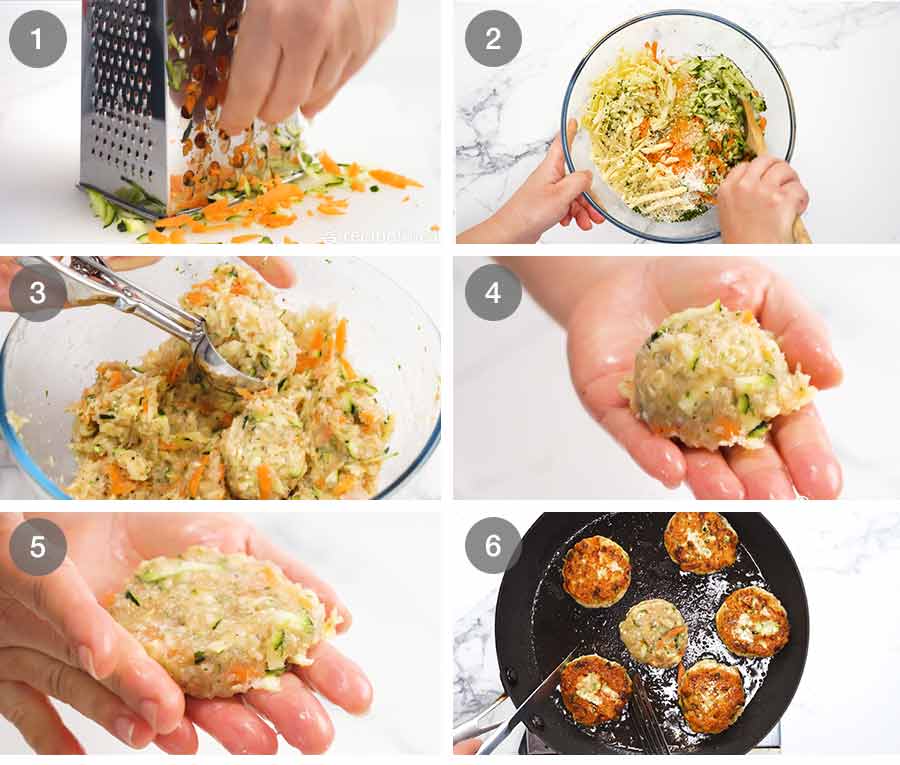
I need to share more recipes that are so straightforward I only need 6 simple step photos like below! Just what I needed after Friday’s Vegetable Dumplings, which totalled a whopping 30 process shots!!! (But it’s still a really easy recipe, I swear 😂)
-
Grate the zucchini and carrot using a standard box grater,
-
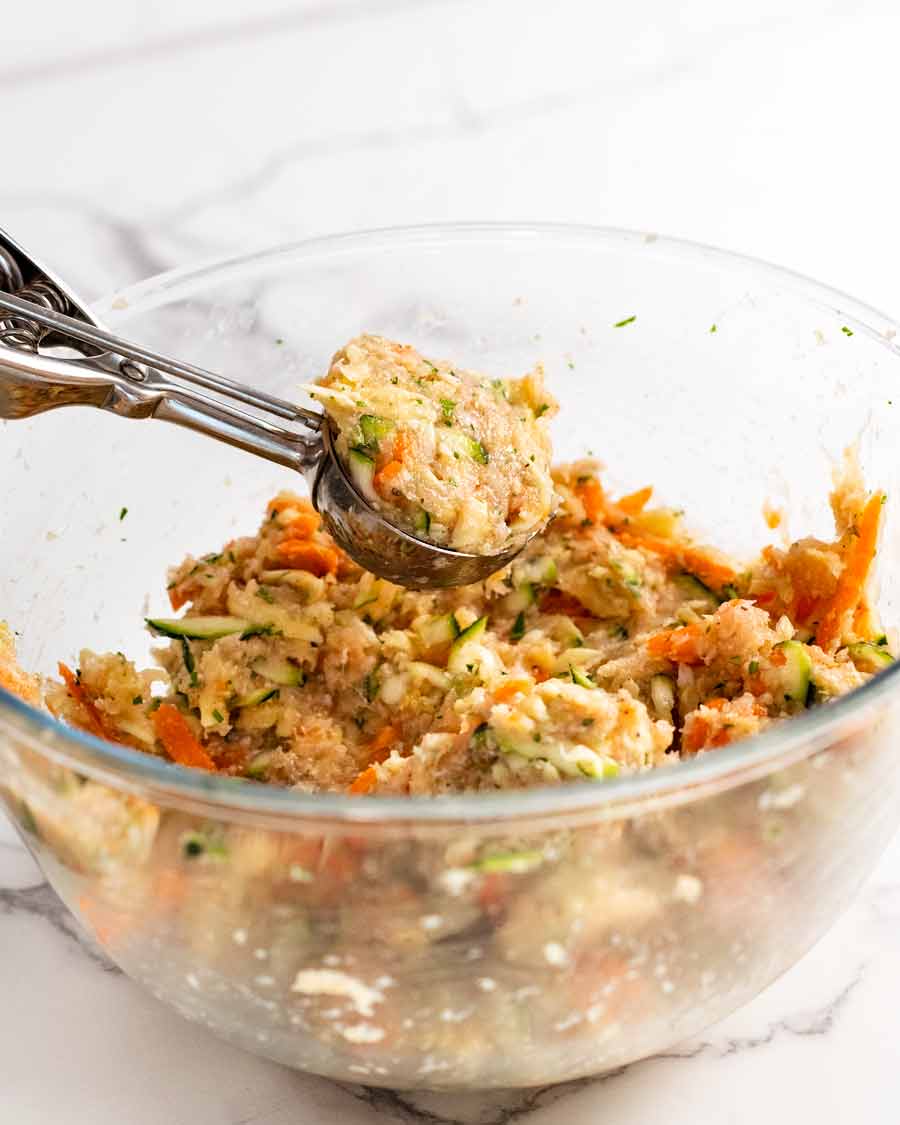
Mix all the rissole ingredients together in a bowl using a wooden spoon.
-
Scoop up just shy of 1/4 cup of mixture. TIP: An ice cream scoop with a lever is super handy for making patties and meatballs!
-
Wet your hand with water (so the mixture doesn’t stick) and place the ball of mixture on your hand.
-
Shape it into a patty.
-
Cook 5 to 6 patties at a time in a non-stick pan for 3 to 4 minutes on each side until golden and crispy. Keep cooked rissoles warm in a low oven, sitting on a rack set over a tray (this stops the underside from going soggy).
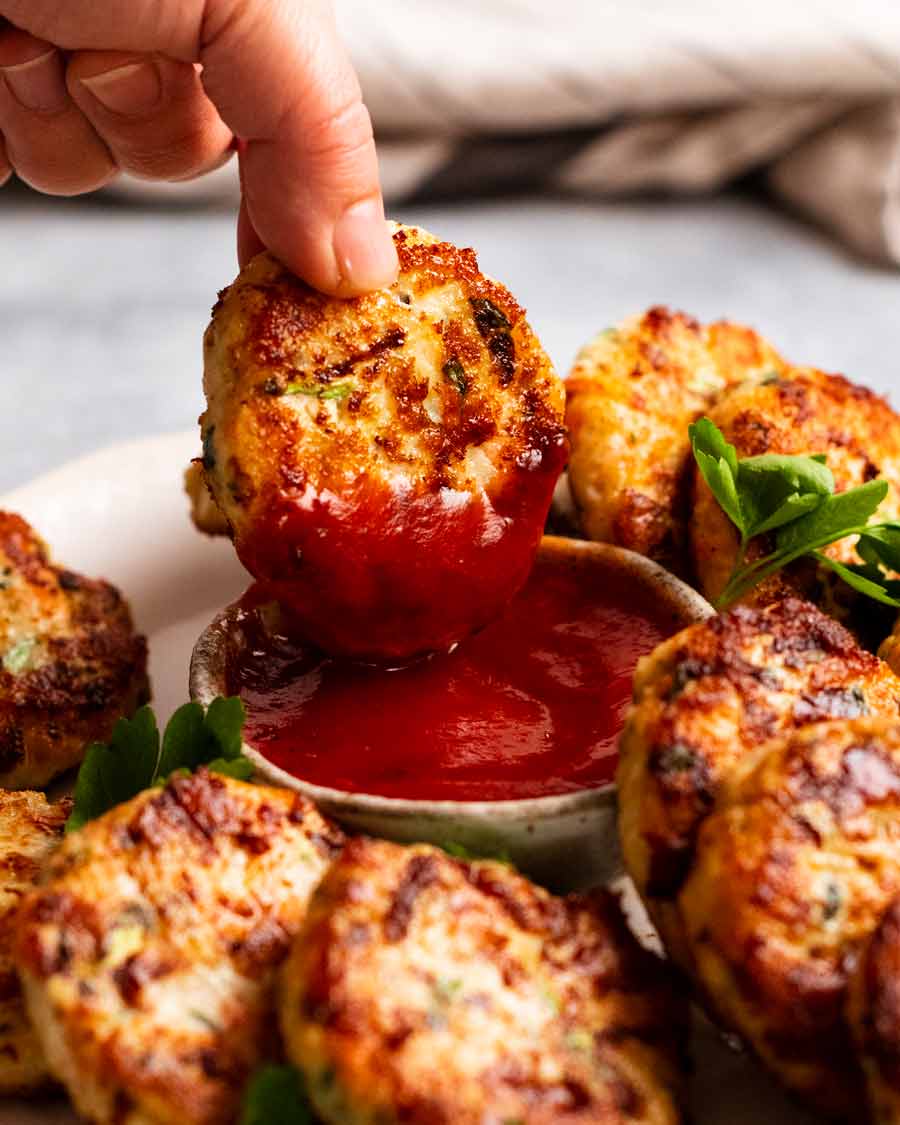
And that’s it! Pile them up on a platter with ketchup on the side for dipping. Rissoles are normally a meal eaten with knife and fork, but they’re also delicious as finger food. Either way, get your people stuck in while they’re hot!!
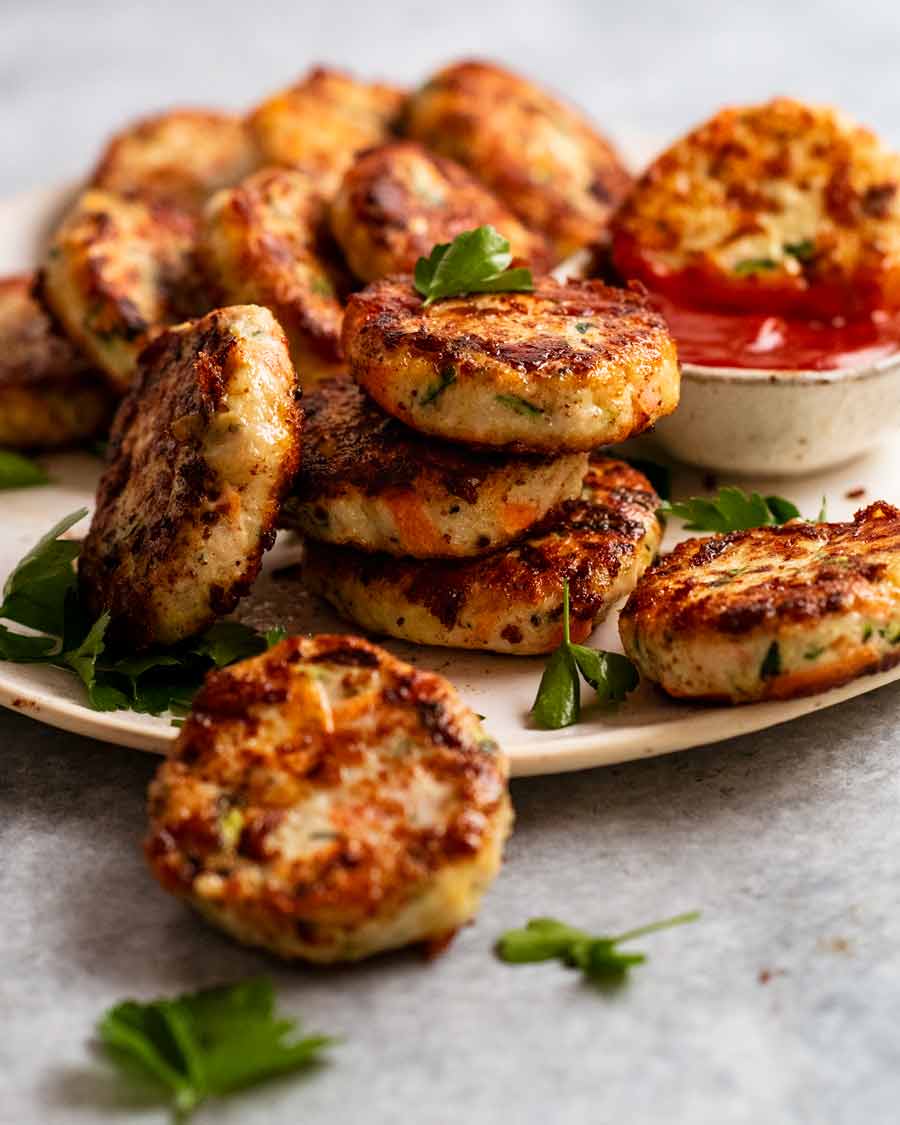
Before you ask, I did try baking them too. It works but I found that you can’t get the same amount of attractive dark colour on the surface without overcooking the inside. They’re still tasty, and I would do it if convenience was a priority (so I’ve included directions in the notes), but pan-frying really is better for these rissoles.
If baking convenience is what you’re after, try these Baked Chicken Broccoli Patties. The addition of broccoli protects the chicken mince from drying out in the oven so you can bake it for a bit longer and thus get more nice colour on it.
Oh and don’t worry. Those have cheese in them too. ☺️ – Nagi x
Did you know … you can fritter almost anything?
Watch how to make it
Hungry for more? Subscribe to my newsletter and follow along on Facebook, Pinterest and Instagram for all of the latest updates.

Chicken Rissoles
Prep: 15 mins
Cook: 20 mins
Mains
Western
Servings16 rissoles
Tap or hover to scale
Instructions
-
Pre-heat oven to 100°C/210°F (all oven types), to keep cooked rissoles warm. Place a rack over a tray.
-
Rissole mixture: Mix all ingredients together in a bowl using a wooden spoon.
-
Form patties: Wet your hands (stops the mixture sticking all over your hands). Measure out just shy of 1/4 cup and shape into a 6 cm wide x 1.5cm thick pattie (2.4″ x 0.6″ thick). See Note 1 if your mixture is too loose.
-
Cook: Heat 1 tablespoon oil in a large non-stick pan over medium high heat. Cook 5 – 6 rissoles at the time, 3 to 4 minutes on each side, until beautifully golden (as pictured). (Note 5 for baking)
-
Keep warm: Transfer to the rack on the tray and keep warm in the oven. Add more oil as needed and cook remaining rissoles.
-
Serve straight away with ketchup for dipping!
Recipe Notes:
2. Grating on a shallow angle – The goal is to grate short rather than long strands. To do this, hold the carrot/zucchini perpendicular to the box grater as you grate. This will make the shortest strands. If you hold them on a steep angle, you will get long strands which isn’t ideal here.
Feel free to double up on either carrot or zucchini if you want more vegetables.
3. Cheese – Most cheeses will actually work (because, cheese!) But the ideal cheese has flavour without being overpowering, can be shredded, and melts into cheesy strings. Colby, cheddar/tasty, Monterey Jack, provolone and gouda are my picks.
4. Panko breadcrumbs – Japanese breadcrumb favoured for the extra-crispy coating it gives crumbed foods, and makes the inside of things like rissoles softer compared to using finer regular breadcrumbs. Find it in the Asian aisle of most large supermarkets. Substitute with 2/3 cup regular breadcrumbs if you can’t find it. A reader also reported gluten-free breadcrumbs worked great!
5. Baking – Pan frying really is the best way to cook these for best results. Baking isn’t as good but they are still tasty (thanks to the cheese!). Spray the patties well with olive oil spray and place on 2 large lined trays. Bake at 220°C/430°F for 15 to 18 minutes, flipping halfway. They will be a lighter colour than pictured. The chicken will overcook and dry out if you bake them for too long.
6. Storage – Keeps for 3 days in the fridge. Freezes fine but not ideal, I think you will lose juiciness inside (simply because chicken is lean).
7. Nutrition per rissole.
Nutrition Information:
Calories: 132cal (7%)Carbohydrates: 4g (1%)Protein: 9g (18%)Fat: 9g (14%)Saturated Fat: 3g (19%)Polyunsaturated Fat: 1gMonounsaturated Fat: 4gTrans Fat: 1gCholesterol: 49mg (16%)Sodium: 274mg (12%)Potassium: 237mg (7%)Fiber: 1g (4%)Sugar: 1g (1%)Vitamin A: 821IU (16%)Vitamin C: 3mg (4%)Calcium: 99mg (10%)Iron: 1mg (6%)
Life of Dozer
When Dozer has an upset stomach, it’s time for his “man buns”. They help keep parts of him – ahem – clean, shall we say. Practical – and hilarious. (PS He’s fine now! Don’t feel too sorry for him, it was no doubt self-inflicted, eating something he shouldn’t have.)


